
Ever see a fence on its side? Well that’s called horizontal… Typical fences are vertical and built from vinyl, wood or other composite material. Also the typical fence supporting structure is common using two 4×4’s posts spanning about 8 feet apart cemented into the ground about 24″ then with three – 2×4 cross members connecting the 4×4’s on the top, bottom and middle. This common construction gives enough support to hold a fence. Most state county’s require this type of fence construction so the fence will hold up in higher than normal winds and will last and not fall down. Back in the day a lot of contractors use post mix, they would dig a hole, pour the dry post mix into the hole, then add water and move to the next post… A LOT of these fences blew down in the early 90’s because they just didn’t hold. Of course you can also tamp in the posts using dirt and rock but it takes more time and I believe is more work. Any who, let’s get started.
The idea of the horizontal fence came about when my lovely wife and I were searching different looks for landscape design and we really liked the horizontal fence look. There are many different ways to build a horizontal fence and we liked many styles. In viewing the different styles there are staggered seams where the board seams do not line up, there are designs where screw holes or rivets are used to fasten the fence, this can give it an industrial look if done correctly. Other fences have large gaps between the boards and some with no gaps or very small gaps, while other fences have a more abstract look.
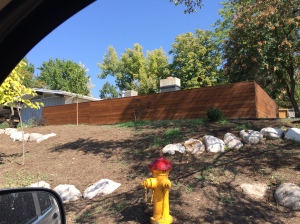 I drove the neighborhood looking for what others have done. I like the look of this fence, its a bold look, sitting on the hill.
We decided to go with a clean and crisp look where no nail/screw holes are seen and a boxed profile look vs a thin single board profile look. The design starts with digging dirt! Holes about 24″ deep with about 4-6″ of gravel or crushed stone. This prevents the post from sitting in the dirt and rotting from the center out over time.

Form up the posts, then pour cement, I’ve learned that a typical post hole will take up to 2, 80 lb bags of cement. With horizontal fence building since the board is horizontal rather than vertical, it requires another support in between the 8 foot span of posts. You can do this with a post, or by adding two vertical 2×4 cross members then another two horizontal cross members dividing the space in thirds, although the additional cross members are not as stable as adding another post and could bow/twist over time.

Here I decided to install a post every 4′ since and I purchased 10 foot 4×4’s, cut them in half so I could get 2 posts. I would have used 4×4 rough cut cedar vs using the treated green 4×4’s but i couldn’t find any at the time. I believe rough cut cedar is a more superior wood than using treated lumber. Cedar naturally resists termites and does well in the weather. Treated lumber is ok, but I think it dry’s up over time becoming brittle. That is just what I have seen.
I didn’t take any pictures starting at the first board, but let me explain the steps taken. First off the cedar boards I used are 7/8 thick, which is a lot thicker than you can pick up from the local box store. A thin board wouldn’t hold up overtime and would most likely bow and twist, even most fence suppliers will sell the 3/4 thickness, if you can get the 7/8″ thick its worth it and the same price. Also these are 8′ long vs what you mind typically find at 6′.
Its very important the first row is perfectly level because if one board is off, then every row is off by that same amount. Once the first board is level and installed, the rest goes pretty fast. Well sort of fast
As I mentioned earlier we wanted the look of no nail or screw holes so I found this blind fastener system called Hidden Link.

Here is the hidden faster installed and what one looks like (left). The system requires 8 fasteners per board, 4 on the top and 4 on the bottom, each requiring to be screwed into the cedar with a 1″ stainless steel screw, then the cedar board would screw into the 4×4 with a 1.5″ stainless steel screw. The stainless steel should hold up over time in the treated lumber and will not rust. Another nice feature using this hidden link system is it keeps a 1/16th or so gap between the post and cedar boards to allow the fence to “breath” and this should help prevent rot and moisture build up.
From the back side you can see how the lower clip will lock behind the first row board.

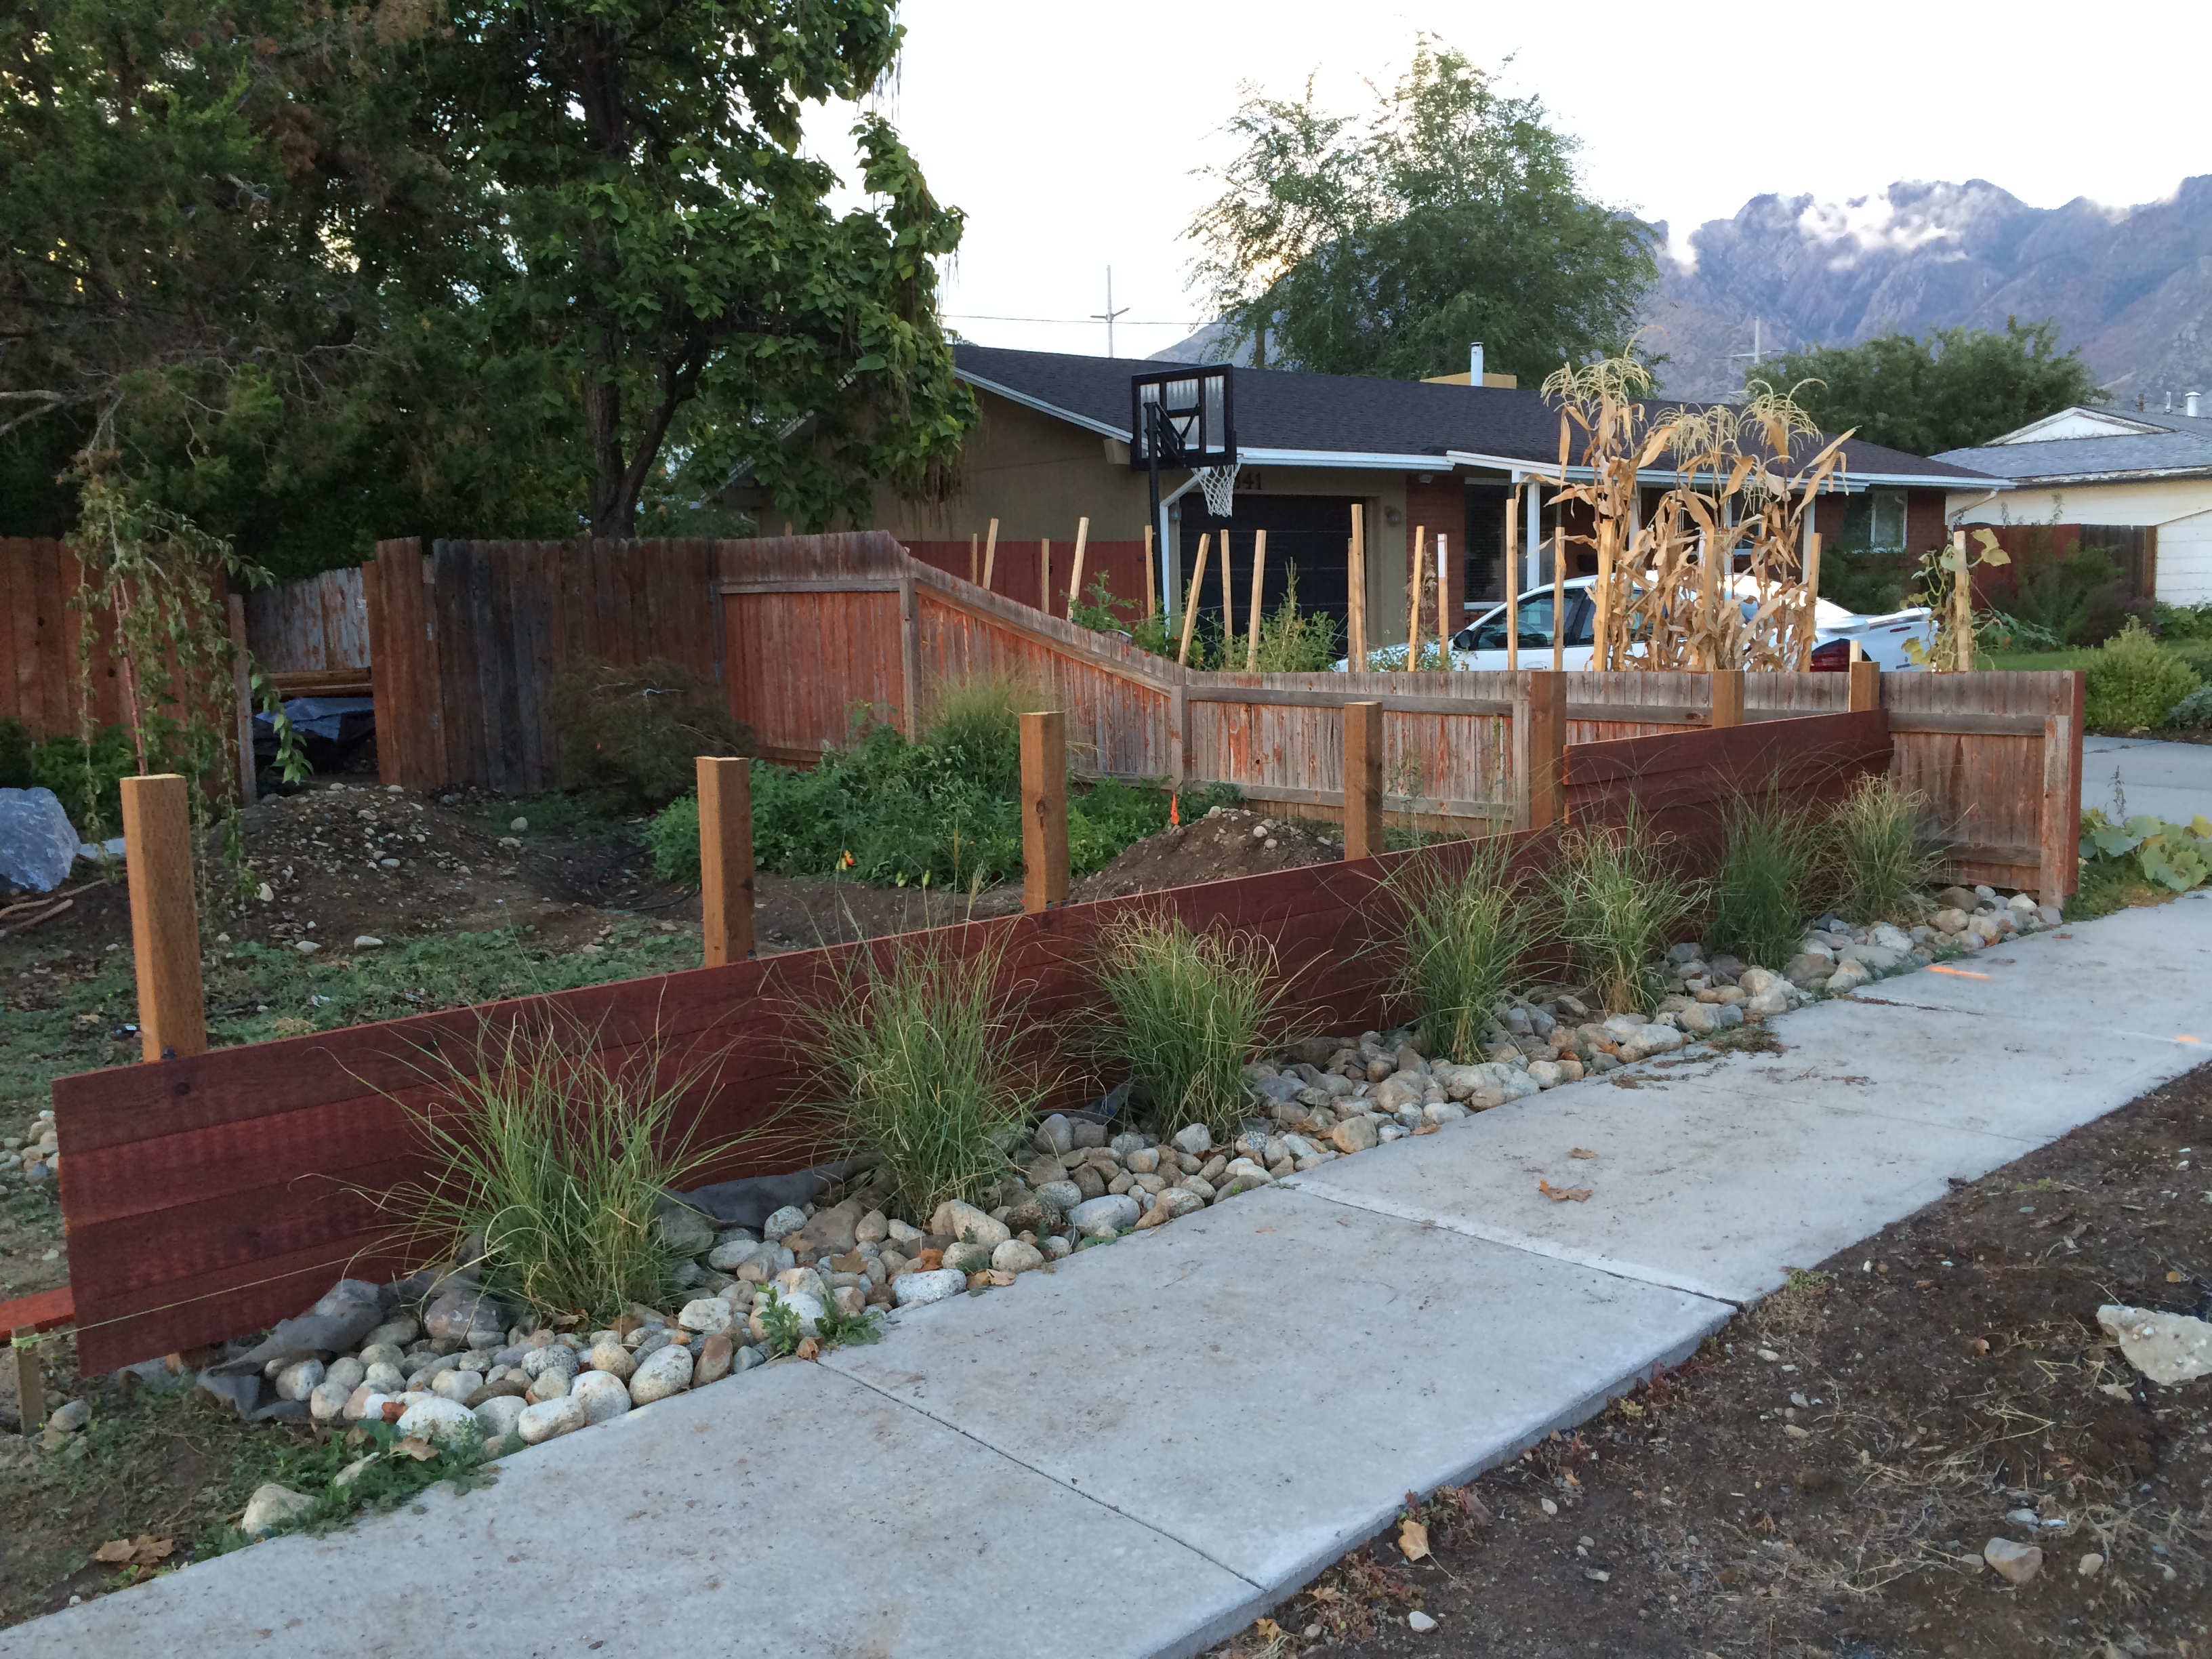
As I continued to build the fence, we wanted the box profile look and therefore I wrapped the cedar around the end and along the back side of the fence. I cut the ends on a 45 degree to give it a clean look and to avoid exposing the end grain of the wood.

Just a few more rows left!


The fence is all completed. We added the grass and granite cobble to dress it up. The granite cobble was a bonus found in the yard while digging it up!


Next, build a large raised planter – Check out Part 4 of the yard transformation!
