The idea came to mind after my wife and I wanting some more privacy between the neighbors home and ours. We knew that planting hedges on the ground would take forever to grow and growing a wall of hedges is a bit outdated days anyways. We have always admired the horizontal fence design and after searching online for horizontal privacy fence we came across many designs with built in flower boxes which we thought was a great idea. The large raised flower bed complements the design we are going for by using the horizontal fence, as well as creates a walled in area for our Japanese rock garden area.
Going into the build I had 2 main concerns. 1) the size of the planter was going to be huge and the weight of the dirt and rock and 2) making sure I have proper drainage to prevent the wood from rotting. A project like this can rot very quickly if wet heavy dirt is pressed up soaking into the wood all summer, then freezing during the winter. I’ve seen big planters like this fail and break open.
The design had to be good looking, a bit modern and the wall couldn’t have any screw or nail holes as this would detract from the design we are going for.
Step 1, start digging the holes. I knew the flower box was going to be big and therefore I had to use 4×4 treated posts and cemented into the ground.

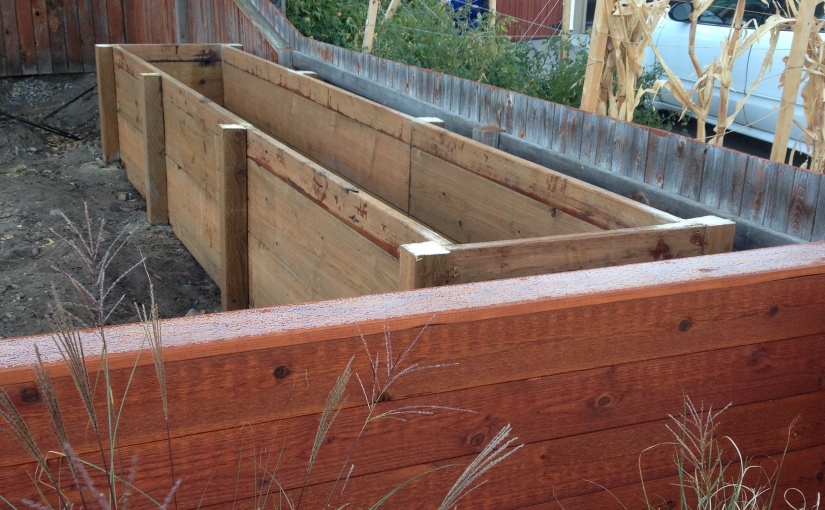
The total length was 16 feet and 2 feet wide and 33 inches tall. I knew this thing had to be strong!
After forming up the 4×4 posts and getting the cement poured. I used about 2.5 60lb bags of cement per hole, some of the holes caved in and I had to use 3 bags. 

Before putting the posts into the ground, purchase a few bags of pea gravel or use 1″ stone fill and fill the bottom of the hole about 4″ -6″, this also ensures the wood is not sitting on the dirt and allows drainage for any water. The post sitting on gravel keeps the post from rotting from the inside up over time.
When cementing posts, ensure that the cement is above grade about 1.5″ and sloping away from the post. You do want to spend all this time cementing in the posts to have dirt sitting up next to the base of the post rotting it away over time. Having the cement above grade slightly ensures that water will drain away from the base of the posts. I also dipped the bottom of the post in a 7 year deck stain.
Next I used 2×12 treated lumber and screwed them to the inside of the posts, this design allows the weight to be pushed from the inside outward for maximum strength. Make sure to use hot dip deck screws which are specially designed for use in treated lumber. Treated lumber has copper and other chemicals pressed into the wood and this will actually break down other types of metal screws over time. Using the hot dip screws ensures a long life of the project. I used 3″ hot dip Deck Mate brand screws. Also remember to search your local classifieds for anyone selling surplus lumber and/or supplies which can save you a ton of money down the road. 2×12 lumber is very expensive.

The first row is done!
Now more rows


Note that anytime I had an end cut I dipped it in the 7 year deck stain, this will help prevent rot down the road by preventing water from seeping into the end grain of the wood. I suggest sealing the end grain cuts when building anything wood outside. This is a critical area to pay attention to and is another step to extend the life of the project.


All done with the “box”. At each seam I used 3″ hot dip screws, 3-4 per seam as well on the end. I designed the end boards so they could be replaced/removed later if needed. Although I don’t think I would need to replace the end.


I trimmed the top of the 4×4’s at the height of the fence in front as I will continue to face the planter with the same horizontal fencing.

Now for the next several steps.
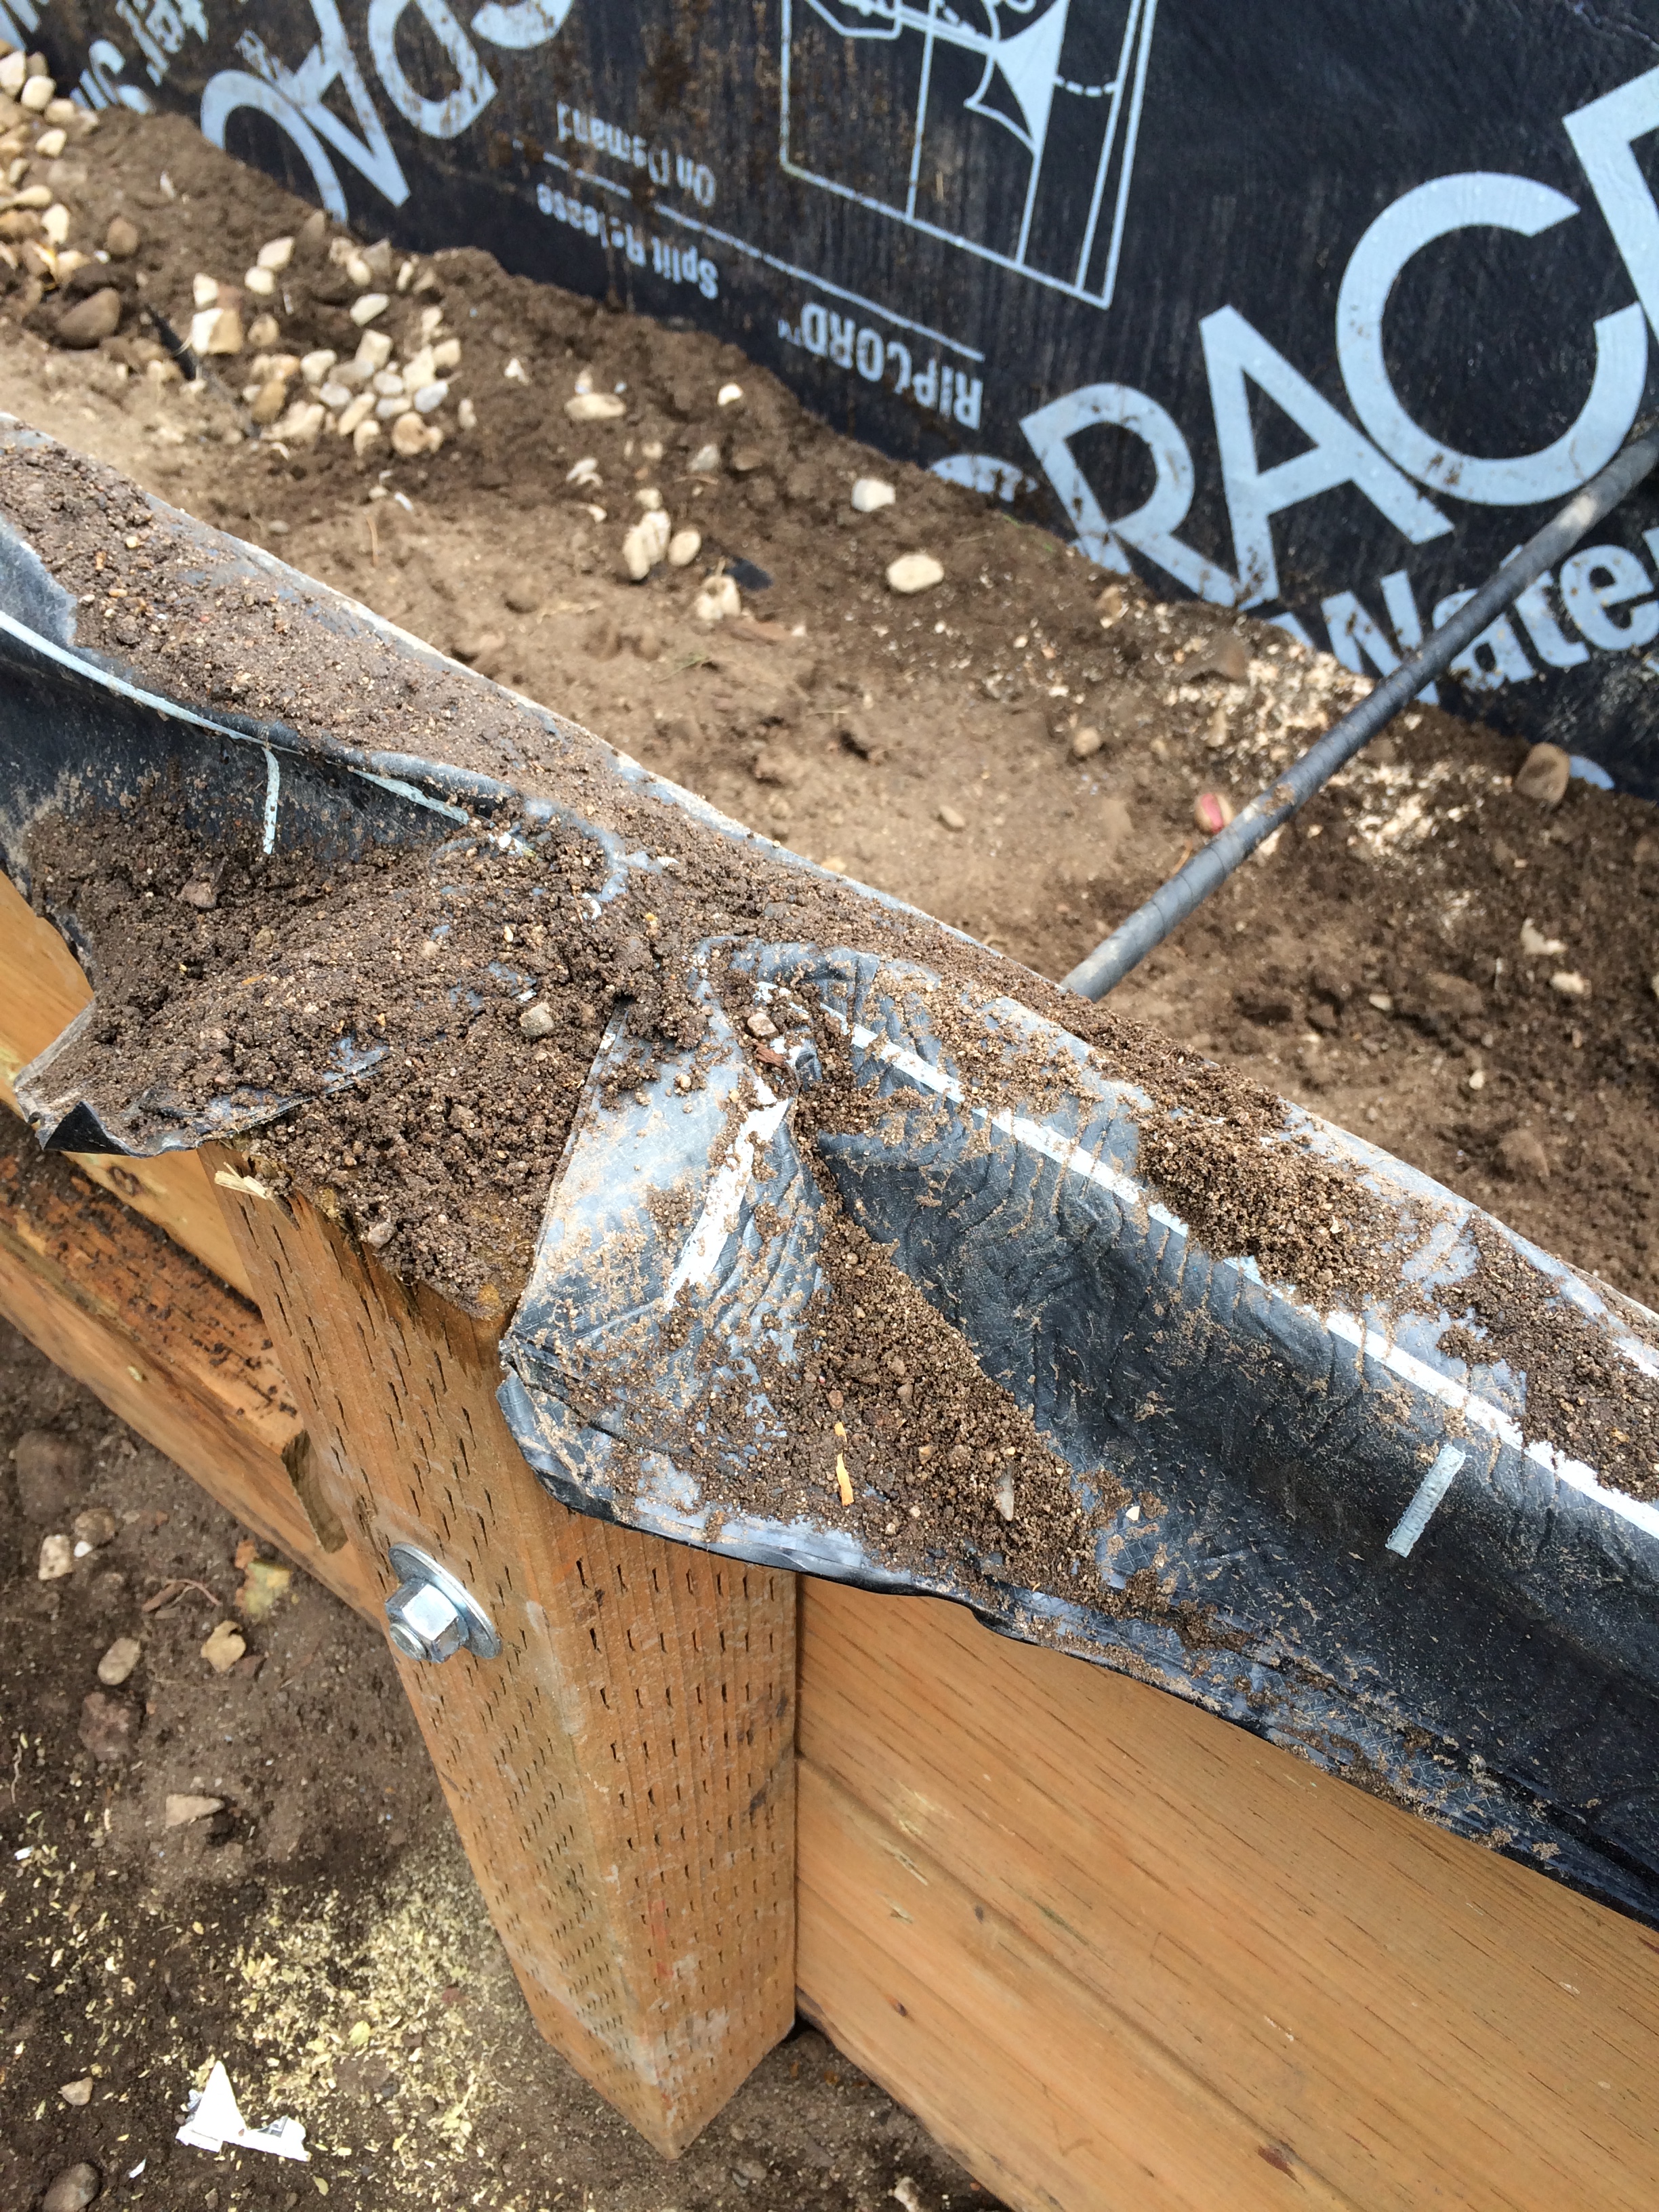
I lined the entire box with Grace snow and ice shield. This was the next best material to use other than pod liner which was very expensive. The Grace snow and ice shield was about $75 for the 3 foot roll. This membrane will be the main barrier preventing the wet dirt touching the wood and extending the life of the project. After lining the inside of the box I needed a good drain system. Its never a good idea to have planter this large and not have any gravel in the bottom for drainage. This is the same design that would be used building a retaining wall and prevents “blow out”. I put a layer of filter fabric down first and filled the bottom of the planter about 12″-14″ deep of 1″ stone. You can get this stone from any landscape supply. Again I found a local company on the local classifieds and was lower cost than any garden box store. The actual rock is very inexpensive, its the delivery fee is what you pay for. I ordered about 2 yards of gravel which was around $150.
I wrapped the filter fabric over the rock, this prevents dirt from getting down into the rock and clogging it.


As I mentioned earlier I was concerned about drainage and ensuring that I had very good drainage. I wanted to take it 1 step further and installed a french drain which went the entire length of the flower box and opened to daylight at the end. In case there was heavy rains, this would help drain the water out of the planter quickly. I sloped the drain tube from one end to the other. I didn’t take a picture of how I installed the drain tube. After dumping in about 2/3 of the stone, I set the french drain in and then covered it with the stone.


N

The planter is now filled with dirt. This was probably about 1.5 yards ? of dirt. I also installed PVC running up through because I wanted to install sprinkler drip system later.
As noted in the beginning of the post my other concern was the weight and preventing “blow out”. My brother told me to drill a hole through the 4×4 posts in the middle and install thread all and this will help “pinch” the planter together in the middle. I also used rubber sealing tape for plumbing and wrapped the thread and this will help prolong the life of the metal. I installed int just below the surface so it will be easy to replace years from now if I need to.

Alright, let’s get started facing this with the horizontal fence. I used 7/8 thick 1x8x8 cedar which you cannot typically purchase from your local box store. You will probably find this at a fence supply or forest product company that has rough cut cedar products. Again I found these on the local classifieds already stained and got a screamin’ deal. I used a fastening system called Hidden Link” , again I was lucky and was searching the local classifieds one Sunday afternoon and found someone selling 3 boxes of these hidden link fasteners for a super good price.

The hidden link blind fastener system. Part of the design was to have NO nail holes.

The 1×8 boards weren’t wide enough, So I’ll need to come up with a way to finish out the edge. I’ll probably just screw two boards together using the Kreg screw system, then rip down to about 7″ which will give enough width to hang over the edge and prevent the need for flashing.

The planter completed with the facing. You can see at the end I left a void for sprinker access, and didn’t want to take the flower box all the way to the end. I can easily build a box that sits over this hole and will make it appear the dirt will go continuous to the fence.


The completed project so far. As the work continues, this project is just one of many that I’ll be posting about transforming our yard into a Japanese rock garden
If you have any questions, please feel free to add a comment ! After searching around the internet, there were very few articles on how to build these large planters so I decided to create a blog with detailed instructions and photos! Also be sure to check out Part 3 horizontal fence if you haven’t done so!
